The Amiga Workbench
The Amiga Workbench is the file management and desktop environment (hence the name, workbench, as in a bench where your work is while you work on it) that enables the user to start programs using a point-and-click windowing metaphor in order to access files stored on storage mediums, such as floppy disks, hard disks and Compact Disks.
Along with the ‘Workbench’ metaphor, there are several different types of icons you will find, which have different meanings and usage:
- Disk icons: These are for storage mediums, permanent (such as a CD) and temporary (such as the RAM disk).
- Drawer icons: hese are functionally equivalent to directories or folders on other systems, allowing other icons to be stored within them.
- Trashcan icons: These are much like Drawer icons, only temporarily containing files to be deleted.
- Tool icons: These are the icons for your applications.
- Project icons: These are icons for files.
It is important to note that any Disk, Drawer, Trashcan, Tool or Project can have its own icon, and that these can be changed to the users preference using an icon editor. Workbench treats any file with the file ending in “.info” as the icon for the same file without the .info end. Thus if you have a picture of your Amiga 500, you could give it a file name of “My Amiga 500.jpeg”, and give it it’s own icon, which would be “My Amiga 500.jpeg.info”. Please note that ending a filename with its file type is not required on the Amiga, so you could name it “jpeg.My Amiga 500” or even just “My Amiga 500”. The only files that workbench pays special attention to are ones ending with .info, as those are icon files.
Later versions of Workbench offer greater features and flexibility – the various versions of Workbench 1 had the one application to change various preferences, such as screen colours, mouse pointer colours and shape, and printer, while Workbench 3.1 offers control of many, many more things, as well as features such as ‘datatypes’ that enable any application to read in any suitable information from any file format you have a datatype installed for.
Workbench is strongly tied to the appropriate version of Kickstart, so for example, Workbench 1.3 works best on Kickstart 1.3, however there is in general some level of compatibility, meaning that lower version numbers of Workbench will generally work ok on later Kickstart versions – Workbench 1.3 and 2.1 will work on a machine with Kickstart 3.0 for example. It doesn’t go the other way, so you can’t run Workbench 3.1 on Kickstart 1.3 for example, as Workbench 3.0 will expect at least Kickstart 3.0
In use, workbench uses EXEC and INTUITION from Kickstart, EXEC to start and stop tools, and INTUITION to handle input from the user via the mouse and keyboard, to show the menus, windows and screens. But it loads the users saved preferences from storage when that particular Workbench environment is being loaded. This can lead to some rather strange looking environments – however despite how strange it may appear, everything should function as expected, although there could be differences in operation due to underlying differences in the way INTUITION operates.
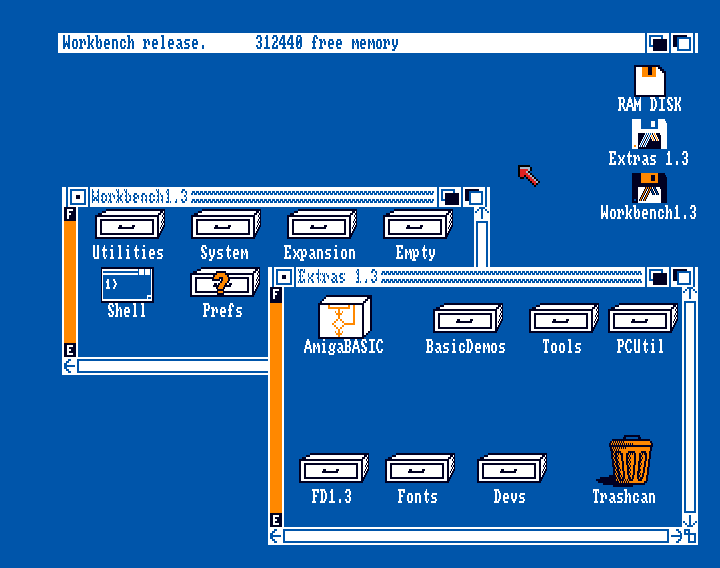 Workbench 1.3 loaded on a machine with Kickstart 1.3 |
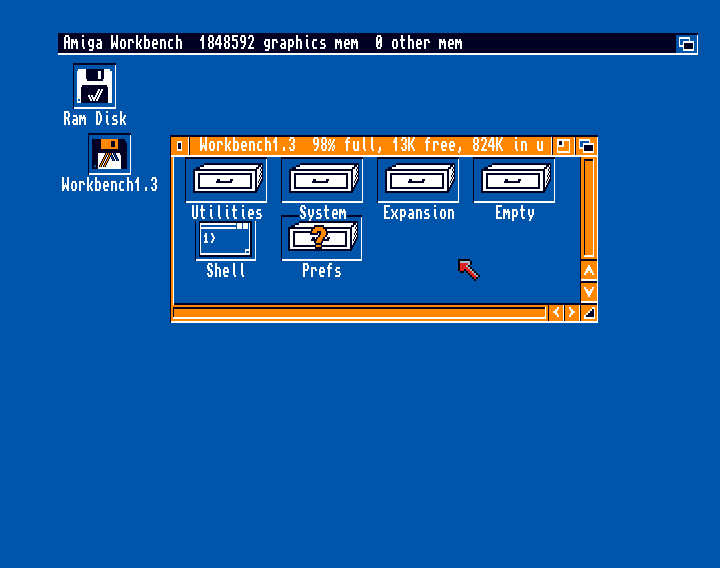 Workbench 1.3 loaded onto a machine with Kickstart 3.1 |
The first thing that is loaded from the storage medium is the colour preferences, various mouse pointers and screen mode. It then opens a CLI window, allowing any status messages or interaction with the user to occur.
The next thing that Workbench does as it starts up, is it looks for a file called “startup-sequence” in the S directory (or drawer to use the Workbench terminology, or folder in most modern operating systems) on the storage medium, which is a text file with a series of instructions for the Amiga to follow while loading that specific Workbench. For an example of a startup-sequence file, click here for a startup sequence from Workbench 3.0
The startup sequence varies considerably, depending on which version of Workbench, and can (and often is) changed by the user or by software during installation. At the end of the startup-sequence is the LoadWB command, which loads the Workbench environment.